 I have a confession to make--I'm a big fan of boxed chocolate cake mixes. Since I've taken an interest in cooking and baking my own stuff, I haven't used a mix in a long while and I kind of miss it. I've tried to make chocolate cake from scratch, following a couple of different recipes, but they've all been wrong, wrong, wrong for a variety of reasons. They weren't moist enough, not sweet enough, not chocolately enough, not fluffy enough. The list goes on.
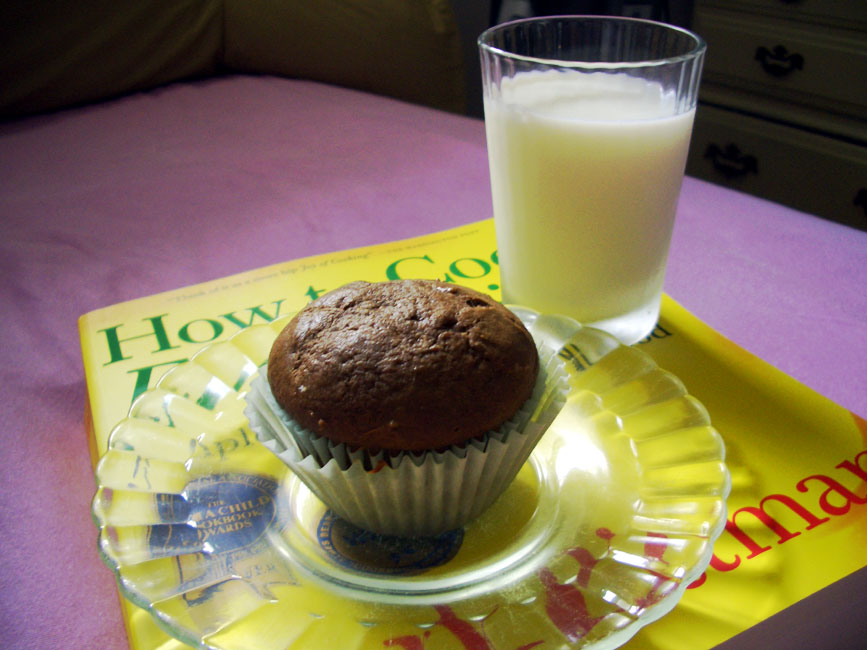
My search for just-the-right chocolate cake recipe continued this past Tuesday when I made a chocolate cake base for the ice cream cupcakes that I put together for my mom's birthday. This time I followed the chocolate layer cake recipe in Mark Bittman's How to Cook Everything. I had pretty high expectations of Mark Bittman; he's a NY Times Dining columnist, he has a blog I visit fairly often, and he wrote a book (the one in question) that people compare with the Joy of Cooking.
Did the recipe live up to the hype? No, but that might have been my fault. I didn't realize that each square of the Ghiradelli chocolate baking bars were only 1/2 ounce instead of one ounce, so I added half the chocolate that the recipe required. I cut back on both the butter and sugar, and I used reduced-fat sour cream. Plus, I'm not sure if my folding technique was up to snuff. The end result of all these factors was bad cupcakes. They looked beautiful and puffed up perfectly, but the taste and texture were off. They were dry and didn't have enough chocolate flavor. I'll try this recipe again before I came to a final verdict, but I'll have to follow it much more closely.
Devil's Food Chocolate Cupcakes (adapted from How to Cook Everything)
Ingredients
- 5 tablespoons of unsalted butter, room temperature
- 2 cups all-purpose flour
- 3 ounces unsweetened chocolate, roughly chopped
- 3/4 cup sugar
- 2 eggs, separated
- 1 teaspoon vanilla extract
- 1 1/2 teaspoons baking soda
- 1/2 teaspoon salt
- 1 cup sour cream
Melt the chocolate, and stir until a smooth consistency is achieved.
Cream butter, and then gradually add the sugar. Beat until light and fluffy before adding the egg yolks, one at a time. Once the egg yolks are incorporated, beat in the vanilla and the melted chocolate.
Mix together flour, baking soda, and salt. Add these dry ingredients into the wet mixture, alternating with the sour cream and stirring by hand. Stir until smooth.
In a separate bowl, beat the egg whites into soft peaks. Then fold them into the rest of the cake batter. Divvy the batter into the lined muffin tins. Bake for about 14 minutes, until a cake tester comes out clean. Cool on a rack until the cupcakes reach room temperature.
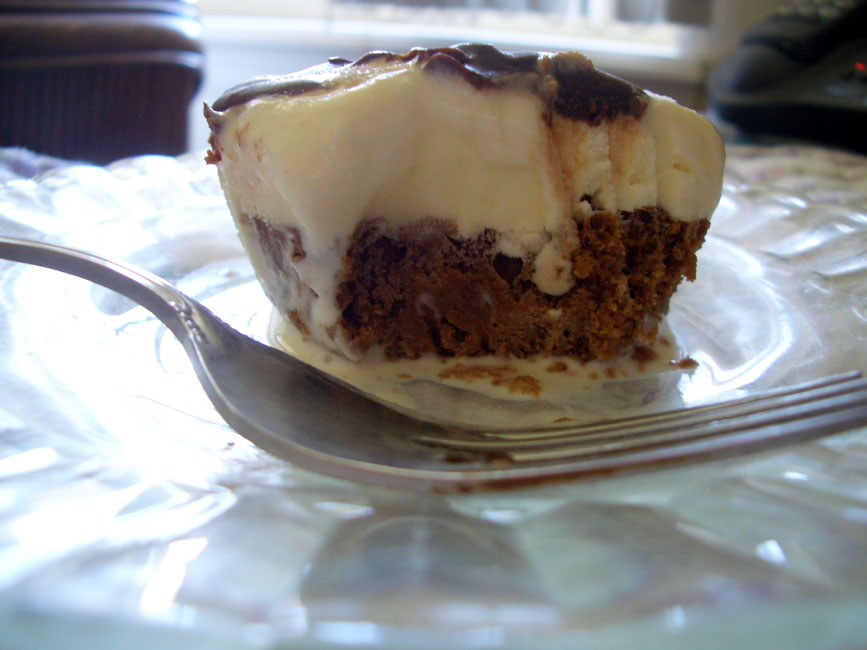 On Tuesday, my mom celebrated a birthday and my dad came back from a two week trip to Vietnam. To celebrate this double whammy, I decided to make ice cream cupcakes, as inspired by Joy the Baker. These tasty treats were easy to make and provided a nice reprieve from the heat that Oklahoma has been bombarded with lately.
All that is really required for these cupcakes are a cake base and some ice cream. I went with a chocolate cake base because I wanted an excuse to try out another chocolate cake recipe. I'm still on the search for the perfect recipe, but more about my quest tomorrow. The ice cream I used for most of the cupcakes was standard vanilla, but I did make a special strawberry one for the birthday girl. I topped it all off with a simple chocolate ganache because people can never have too much chocolate. Right?
If you want to make ice cream cupcakes of your own (why wouldn't you?), head on over to Joy the Baker for a fantastic tutorial. I would provide my own step-by-step instructions here, but my cupcakes came out much messier than hers.
Enjoy!
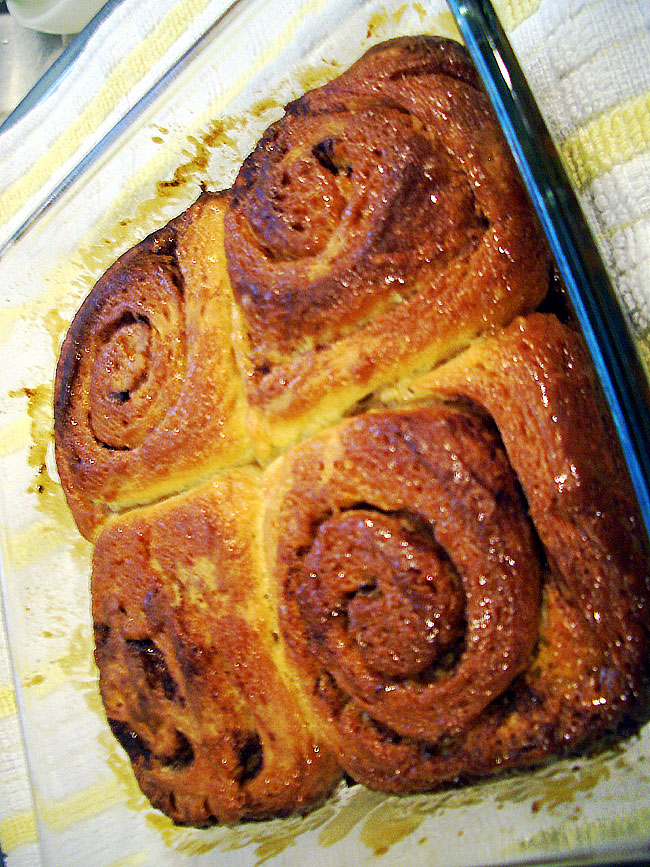 I started out well enough with this week's Tuesdays with Dorie selection. Madam Chow of Madam Chow's Kitchen had picked Pecan Honey Sticky Buns from Dorie Greenspan's Baking: From My Home to Yours, and I was stoked because I love sticky buns. I was so excited about the project that I even started making it early, and that is a big deal because I'm a HUGE procrastinator.
I set out on this adventure on Friday morning by putting together the dough. It took a while and used up a lot of butter, but the dough came together beautifully. After the dough was finished, I went through the long wait. Man, is there a lot of waiting time when making dough! First, I had to wait for an hour while the dough rose at room temperature. Then I moved it to the refrigerator, where I had to slap down the dough every 30 minutes for at least 2 hours until the dough stopped rising. I was a little pressed for time because I had a rendez-vous with my friends in the afternoon, but I managed to allow the dough enough time to fully rise.
The dough chilled overnight, and I formed the buns late on Saturday. The dough was wet and sticky, but it wasn't too hard to work with. Since everyone in my family is trying to eat healthier, I decided to omit the 1/4 cup of white sugar from the filling; this omission might have contributed to my downfall.
I woke up early on Monday morning to set out the rolled buns so that they could rise one last time for at least 1 hour and 45 minutes. I mixed together the glaze and poured that on top of the buns. I then sprinkled some pecans over everything. I later found out that this is opposite of Dorie's instructions, but I think it worked.
The buns baked for 30 minutes in the oven, and they looked so yummy when they came out of the oven. I had to snap a picture right away, but the lighting was poor. Plus, I couldn't focus the camera. I planned to take a proper picture later, but I lost the will to do so after taking one bite of my rolls. All I could taste was salt!!!! For a while, I thought it was because I hadn't added the white sugar to the filling. However, my parents have a habit of buying salted butter when they do the grocery shopping because it's slightly cheaper. I looked at the box of the butter, and sure enough, it was salted. The salted butter might have been the main cause of the horrid taste, but it didn't help that I had cut back on the sugar content of the recipe. Lesson learned this week: check the butter before proceeding!
I'm not sure what I'll be doing with the rest of the dough. I wanted to throw it out, but my mom didn't want it to go to waste and said that she'll eat it. We'll see. I'll leave it in the freezer for a month or so, and then it's going out.
Terribly sorry for the poor quality of the picture. I'll be baking something today for my mom's birthday, and I will hopefully do better. In the meantime, if you want to try out this recipe for yourself, head over to Madam Chow's Kitchen for the details. Good luck!
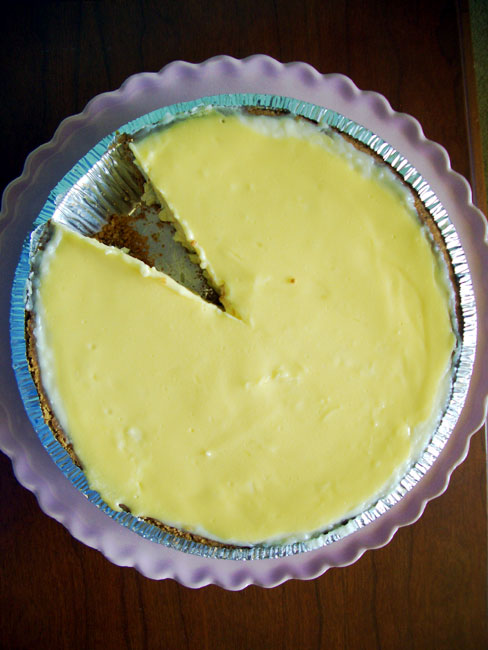 Oh, summer has never seemed so appealing. Now that I am done with finals and am in the midst of my last real summer vacation, I fully intend on making the most of it. To celebrate my last moments of freedom, I baked something--a sunny Florida Pie! I was disappointed that I missed out on this particular Tuesdays with Dorie selection last week due to finals, so I woke up bright and early on Monday morning and whipped it up. I would have liked to make the madelines that Tara of Smells like Home selected for this week's TWD, but I didn't have the special, pretty baking pan. It broke my heart because I ADORE madelines, but it wasn't meant to be this week. Maybe later?
The pie itself was easy to put together (well, I sort of cheated; I used a *gasp* store-bought graham cracker crust); so much so that I got ambitious and set out to make the meringue topping. It was all going very well... But I got a hard lesson on rushing things in baking. Since I had a dentist appointment to make that morning, I thought I would be clever and make the meringue ahead of time while the pie cooled for a bit in the freezer. Once I got the firm, soft peaks of white, I fixed myself some lunch and got ready for a day out. Wrong move. When I was done getting ready and went out to the kitchen to finish the pie, my beautiful meringue was deflated. All that was left in the mixing bowl was a soupy mess of shredded coconut and egg whites.
Luckily, the pie turned out fine without the meringue topping. It wasn't as pretty, but it worked. The taste wasn't bad either. When I took my first bite, I thought that it was weird and not so delicious. I mean, I've never had key lime pie before; the idea of eating something tart as a dessert goes against everything that I stand for. As I devoured the slice below, the taste grew on me. Now I'm kind of addicted and have to sneak in a tiny sliver before and after meals. Oh, summer has never been such a sweet treat.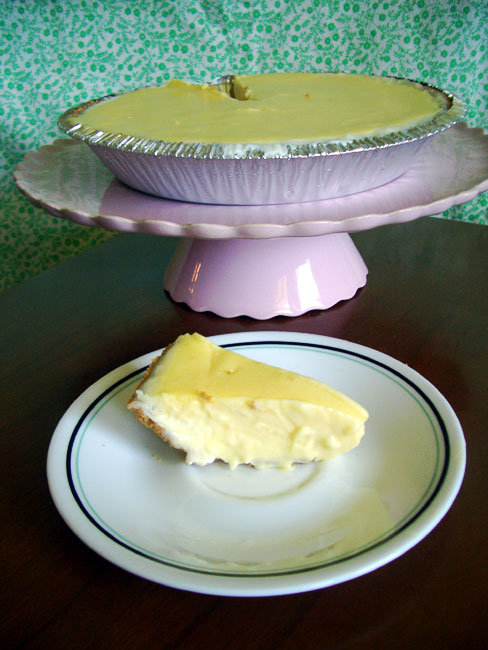 Ingredients (from Dorie Greenspan's Baking: From My Home to Yours)
- 1 9-inch graham cracker crust
- 1 1/3 cups heavy cream
- 1 cups shredded sweetened coconut
- 4 egg yolks
- 14 ounces sweetened condensed milk
- 1/2 cup fresh-squeezed lime juice
Using a stand mixer, beat the egg yolks on high speed until their smooth, thick, and paler in color. On low speed, pour in the condensed milk. Once that's all mixed in, mix in the lime juice, a half of a cup at a time.
Pour in the coconut cream into the prepared crust. SLOWLY pour the lime mixture on top. Smooth over the top with the back of a spoon before popping the pie into an oven preheated at 350 degrees F for 12 minutes. Cool the pie for 15 minutes, and then place it in the freezer to set for at least an hour before serving.
 Just checking in for a quick update to reassure you all that I'm still alive. I had grand intentions of participating in this week's Tuesdays with Dorie selection, but studying and recouping from the lack of sleep over the weekend got in the way. I'm still in the midst of a test block (my final one as a first-year!), but I couldn't stay from you all too long, so I'm going to share a bit of my Sunday celebrations.
As everyone knows, this past Sunday was Mother's Day. It also happened to be my brother's 20th birthday. Considering this double whammy, I had to take a break from memorizing my Physiology notes and go out to dinner with my family. We decided to treat my mom to dinner at Sushi Neko. The ambiance was swaky as usual, and the Seared Tuna Salad appetizer (pictured above) was PHENOMENAL. However, I wasn't super crazy about the sushi rolls. Perhaps it was because I just had sushi a little over a week ago at Tokyo, but I wasn't impressed with the selection at Sushi Neko. I'm going to step out onto a branch and say that Tokyo had a selection more to my liking. Neko still has a superior construction of sushi, though.
After dinner we went home and surprised my brother with an ice cream cake from Cold Stone Creamery. Since it was frozen, it took quite a bit of elbow grease to slice the cake. My mom put her muscles to good work on Sunday night.
 It was all worth it in the end. The Stawberry Passion cake, which is composed of layers of red velvet cake and strawberry ice cream with crushed graham crackers mixed in, was super delicious!
 I hope you all have a wonderful week. I will be back in full swing next week when my exams are over and my summer vacation starts. I will probably be making this week's TWD selection, Florida Pie, over the weekend, so keep an eye out for that. In the meantime, visit the group's blogroll to see everyone's wonderful creations!
Sushi Neko
4318 N. Western Avenue
Oklahoma City, OK 73118
Cold Stone Creamery
315 S. MacArthur Boulevard
Oklahoma City, OK 73128
 Though the whole cramming experience leading up to final exams can be horrendous, there is one great thing about studying for test blocks--dining out. Since quite a few of my classmates study on campus, we tend to eat out quite a bit during our study breaks. Yesterday, my friend surprised me in the afternoon by taking me to Kaiser's Ice Cream Parlor.
Located on probably the only roundabout in Oklahoma City, Kaiser's is actually a historic landmark. The name of the cafe inside of the building is somewhat more modern--Grateful Bean Cafe--but the decor of the place is vintage through and through. Decked out in 1950s soda shop style, Kaiser's seemed to be the perfect place for an ice cream break. Even some of the people working at the parlor were dressed for the part (check out lady in the background of the picture). The best part about Kaiser's is that it serves homemade ice cream. Some of the flavors, like the vanilla on the right side of the picture, are all organic.
While my friend went old-fashioned route, I decided to try the tiramisu-flavored ice cream. My friend definitely won this round; the vanilla flavor was fresh, strong, and totally delicious. My only complaint about the vanilla was that you can actually taste the fat from the cream or milk used to make the ice cream. Its texture kind of clung to the roof of your mouth, which became a bit unsettling after a while. Other than that, I thought the ice cream was great and can't wait to try some of the other flavors. I might even go to the cafe for lunch some day. While we were waiting for our ice cream, my friend and I browsed through the menu and spotted many delicious-sounding, wholesome dishes.
A bit of warning: the ice cream a little pricey. It was about $3.25 (including tax) for a cone and single dip, but I felt like it was worth every penny, especially since they give you such large scoops.
Grateful Bean Cafe at Kaiser's
1039 N. Walker Avenue
Oklahoma City, OK 73102
 Well, today marked the first day of yet another scramble to prepare for test block. For the next couple of weeks, I'll spending most of my time at school, studying in a tiny computer room that might be infested with large cockroaches. This means that there won't be much time for baking or even cooking in the upcoming weeks. I couldn't have felt the pain of this more last night when I was eating white rice topped with a fried egg and covered in soy sauce. This combo is my go-to meal when I have nothing in the house to eat. It's not great by any means, but it gets the job done.
While I wolfing down my less-than-stellar dinner, I couldn't help but reminisce about the WONDERFUL dinner that I had with my friends on Friday night. Every year, a couple of friends and I get together to mark the anniversary of the day we all met up in Paris and journeyed to Clermont-Ferrand for our semester abroad. Since we've all been busy with school and work, our reunion was delayed a bit this year by over a month, but it's better late than never, right?
We started the evening at Tokyo Japanese Restaurant for some sushi. It was the first time that any of us had ever been to Tokyo for sushi, and we were all happy with the results. All of the rolls that we ordered we delicious, but there were a few stand out ones--spicy tuna roll, Dynamite Crunch, Stamina, and the spider roll. Tokyo is lacking in the appetizers department in comparison to it's trendier competitor, Sushi Neko on Western Avenue, but I would say that the rolls are comparable. If you're looking for good atmosphere, you should head on over to Sushi Neko, but if it doesn't matter either way, give Tokyo a try.
After we finished all of our rolls, we weren't quite full yet and were hankering for some dessert. We didn't feel like have any of the desserts at Tokyo, so we headed to The Melting Pot in Bricktown for some chocolate fondue. The Melting Pot is a chain restaurant that specializes in fondue; even though it's a chain, it's still pretty cool to go to. Among the four of us, we were able to devour a large serving of the Cookies and Cream chocolate fondue, which is basically dark chocolate melted with some marshmallow cream and Oreo crumbs and then flambeed at the table. What did we dip in the chocolate? Everything that is pictured below. That's right; we dipped cheesecake, rice krispy treats, marshmallows, brownies, pound cake, strawberries, and bananas in a pool of chocolate. The greatest part was that they refill the dippers for free; it's unlimited! It was a really sweet and decadent end to a great evening of memories and delicious food. What a yummy way to celebrate the start of two weeks of solid cramming! Tokyo Japanese Restaurant
7516 N. Western Avenue
Oklahoma City, OK 73116
The Melting Pot
4 E. Sheridan Avenue
Oklahoma City, OK 73104

I certainly was in a homey, baked goods kind of mood this weekend. While I was at the supermarket to buy ricotta cheese and yellow cornmeal, I grabbed a tub of sour cream and a small carton of buttermilk so that I could finally test the chocolate layer cake recipe I snagged from Buttercup Bakes at Home. Properly titled "Our Favorite Chocolate Layer Cake," this is supposedly the recipe that is used at Buttercup Bake Shop to make chocolate cupcakes. I've never had the fortune to visit New York City and actually sample these cupcakes, but I'm assuming that they got to be something special to be famous, so I was pretty excited about trying out this recipe.
Ingredients (From Buttercup Bakes at Home)
- 1 cup all-purpose flour
- 1/4 teaspoon salt
- 1/2 cup sugar
- 2 large eggs, room temperature
- 3/8 cup buttermilk
- 1/8 cup sour cream
- 1/2 teaspoon baking soda
- 1/2 cup butter, softened
- 1/2 cup light brown sugar
- 3 ounces unsweetened chocolate, melted
- 1/2 teaspoon vanilla extract
I first melted the chocolate by microwaving it on high for 30 seconds at a time and stirring often to ensure even heating. Once I got some dark brown liquidy goodness, I set it aside and started putting together the foundation of the batter.
I creamed together the butter and sugar for a couple minutes until smooth and fluffly. Then I added the eggs one at a time and beating them in after each addition to fully incorporate them. Once I got a uniform batter, I added the dry ingredients one at a time while alternating it with additions of vanilla extract and buttermilk. Finally, I stirred in the sour cream and melted chocolate until everything was a rich brown color.
I poured the batter into a 9 x 9-inch baking pan that had been sprayed down with Baker's Joy baking spray. I put the pan into an oven preheated to 350 degrees F and baked the cake for about 23 minutes. When cake tester came out clean, I pulled the pan out of the oven and allowed it to cool to room temperature. I know this is a bad move because you're usually supposed to remove the cake to a wire rack for cooling, but I was too lazy to do so.
While the cake cooled, I whipped up some chocolate buttercream frosting to top the cake. I would offer a recipe for the chocolate buttercream, but I didn't follow one. I have this habit of mixing together frosting ingredients in a stand mixer and altering the amount of each ingredient until I get something that I like. All I can really offer you is that I used unsalted butter, powdered sugar, melted semisweet chocolate, and a couple of splashes of milk and vanilla extract to make this frosting.
After I frosted the cake, I was finally able to sample the cake (sampling is my favorite part of the baking process)! At first I thought that the cake was nice. It had a subtle sweet taste; the chocolate flavor wasn't too strong. The frosting really complemented the cake. However, while I was chewing my second bite, I noticed that the texture was a bit off. It was moist but dry at the same time. The cake overall was moist, but the individual particles of the cake were dry. Does that make sense? I have no inkling about how I ended up with this phenomenon; perhaps it was because I used reduced fat sour cream. I have no idea. If you have any theories, please send them my way. While this recipe was solid, my hunt for the perfect chocolate cake recipe still goes on.