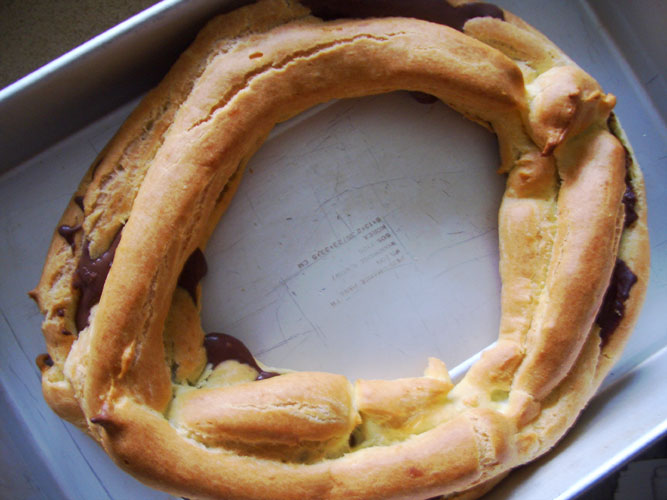
Despite its fancy reputation, the choux pastry came together beautifully and easily; it was very exciting to watch it bake and puff up in the oven. I opted to make a chocolate cream filling rather than a peppermint cream filling because I was making the cream puff ring for an office party, and chocolate is usually more popular than peppermint. Plus, I didn't have any heavy cream sitting in the fridge for the peppermint cream. Making the chocolate cream was the only involved part of this recipe, but it wasn't too bad.
The part that did give me a lot of problems was piping the choux pastry in a ring shape. I used a modified ziploc bag instead of a proper pastry bag to do the piping, and the zip part of the apparatus couldn't withstand all of the pushing and squeezing. The choux pastry ended up oozing everywhere, but I was able to save enough of it to make the ring and three little cream puffs on the side.
Even though I had allowed the chocolate cream to chill in the refrigerator for two hours, the cream was still quite thin when I started assembling the cream puff ring. I didn't want the chocolate to drip all over my co-workers' clothes during the office party, so I cut back on the filling. The cream was too thin to pipe and I didn't fancy having another piping fiasco, so I just spooned half of the filling into the ring. The reduction in chocolate cream ended up being a waste because it set up nicely after being in the refrigerator overnight.
The cream puff ring was good, and everyone at work seemed to like it. The cream puff ring didn't look as perfect as the one pictured in the book, but I think its unevenness gives it a rustic charm (at least this is what I've been telling myself). I was really pleased with the choux pastry and will be experimenting with it more in the future. Below is the recipe for the chocolate cream, but the recipe for the choux pastry can be found at Caroline's blog. Don't forget to check out all of the TWD bloggers; you'll be in for a treat!
Chocolate Pastry Cream
Ingredients (adapted from Dorie Greenspan's Baking: From My Home to Yours)
- 2 cups reduced fat milk
- 4 large egg yolks
- 6 tablespoons white sugar
- 3 tablespoons cornstarch
- Pinch of salt
- 7 ounces of semisweet and 80% cacao chocolate, melted
- 2 1/2 tablespoons unsalted butter, cut into bits, room temperature
Remove from heat, and whisk in the melted chocolate. Allow to stand for 5 minutes before whisking in the butter. Once the butter is incorporated, transfer the cream to a bowl. Cover the cream with plastic wrap, making sure to press the plastic to the surface of the cream. Place the bowl into the fridge and allow to chill for sometime (more than 2 hours, preferably overnight). After the cream is set, use as you please, such as filling your very own cream puff ring!
 Happy Friday the 13th! Even though this date is synonymous with bad luck, I'm feeling lucky today because I am finally writing about one of my favorite restaurants in the area--Cafe Antigua. Serving authentic Guatemalan food, this little restaurant is a frequent haunt for my friends and me. It had been a while since I ate at Cafe Antigua, so I met up yesterday with a friend for lunch there.
I ordered the usual--Motulenos (above), which is two over-medium fried eggs served on a bed of tortilla and mashed black beans. Slices of fresh avocado and queso fresco top it all off, along with chirmol, a tomato-based sauce. A handful of tortilla chips completed the dish. My friend ordered his usual--Migas, which is a plate of eggs and black beans served with a side of fruit salad topped with mango sauce. Being high-rollers, we decided to treat ourselves and split a papaya smoothie. The meal lived up to all expectations and definitely did not disappoint. My eggs were just right, the avocado slices were firm, and the tortilla chips had a great crunch. All of the simple tastes of my dish came together well to create a flavorful and fresh experience. I can't really describe my meal; I wouldn't come close to doing it justice. I felt like it was everything a meal should be--filling, fun, and delicious. The dish itself was already filling, but each order was served a starter soup. Then my friend and I drank a smoothie on top of that. I was completely stuffed when I finally put my fork down. The meal was so filling, that I seriously had problems staying awake when I reported back to work after lunch.
If you are ever in the area, I highly, highly recommend eating at Cafe Antigua. It's a good place for breakfast (which is served all day) or lunch, and it has GREAT meatless options. Even though I'm not vegetarian, I rarely order a meat dish here. Don't get me wrong; the meat options are wonderful as well. No matter your food preferences, there's something for everyone at Cafe Antigua.
May no broken mirrors cross your path today!
Cafe Antigua
1903 N Classen
Oklahoma City, OK 73106

I was first introduced to this dessert during my senior year of college when I was hanging out with the French exchange students from Clermont-Ferrand. One of the French girls had brought over a deliciously moist cake topped with pineapple for our weekly Desperate Housewives watch party. When I asked for the recipe, the girls told me that there wasn't really a recipe; it was all about proportions with the yogurt cake. After learning the ratios of the ingredients needed for this cake, I promptly went home and tried it out with different add-ins. The rest is history. The yogurt cake is my go-to recipe whenever I need a quick sugar fix; it's super tasty but incredibly simple to put together, so much so that this is apparently the first cake that French children learn to bake.
I decided to keep things simple, so I didn't add anything special to the batter like strawberries or chocolate chips. Instead, I just added a couple of splashes of vanilla and rum, and then I called it a day. The cake has a subtle taste, which is oddly attractive; it's not too sweet and it's not bland. This cake is the perfect, down-the-middle kind of dessert. If you have never made or tasted a yogurt cake, I highly recommend you run out to the market for some yogurt and get to work immediately!
Plain Yogurt Cake
Ingredients
- One 8-ounce tub (use this as a measuring cup) of nonfat, plain yogurt
- 2 eggs
- 1 tub white sugar
- 1/3 tub vegetable oil
- 2 hearty splashes of golden rum
- 2 splashes of vanilla extract
- 2 tubs all-purpose flour
- 1/2 teaspoon baking soda
- 1 1/2 tablespoons baking powder
Sift all of the dry ingredients into the liquid mixture. Then mix the batter until the dry ingredients are incorporated. Be careful not to overwork the dough, so stop mixing as soon as you see the last trace of flour begin to disappear.
Pour the batter into a 10-inch, ceramic tart pan sprayed with Baker's Joy baking spray. Place the cake into an oven preheated to 350 degrees Fahrenheit, and bake for 25-30 minutes. As soon as a cake tester poked into the center of the cake comes out clean, remove the cake from the oven. Allow it to cool to room temperature before cutting into it.
Enjoy!
 Happy Monday! After the first week of my internship, I enjoyed a much-needed fun and relaxing weekend. Included in this respite was an outing with a couple of friends that I hadn't seen a long time. We started out the evening at the Museum of Art to catch the newest Audrey Tautou film, Hors de prix (Priceless). If you are looking for a simple yet fun movie to watch, I recommend this one. The plot is pretty predictable, following the same theme as Breakfast at Tiffany's, but the two leads were charming. Audrey Tautou was absolutely GORGEOUS in all of the couture outfits, and Gad Elmaleh piqued my interest. Plus, any movie that takes place in the French Riviera is a good thing.
The movie ended during dinnertime, so we headed over to The Wedge and shared a pizza. We decided to create our own pizza and went with a pesto-goat cheese-tomato combination. The pizza could have benefited from more pesto, but the goat cheese and the slight smoky flavor from the brick oven more than made up for the deficit. The pizza was solid and made for a light and refreshing meal, great for outdoor eating in the summertime. I'll probably be a frequent visitor to this pizzeria; I hope to try a different combination with each visit. The possibilities are endless!
Here's to hoping for a good week!
The Wedge Pizzeria
4709 N Western Ave
Oklahoma City, OK 73118
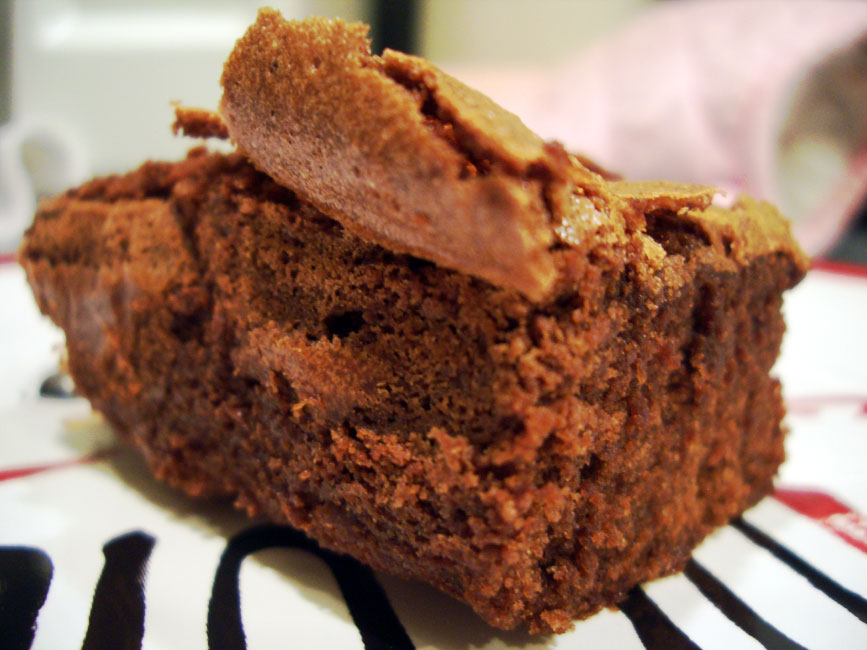
This is my first regular office job, so I was thankful that I didn't have to give even a thought to work after 5 p.m., which is much different than going to school. After taking a guiltless nap, I went to town in the kitchen and whipped up this week's Tuesdays with Dorie selection--French Chocolate Brownies--as chosen by Di of Di's Kitchen Notebook. The brownies easily came together, which was nice since I needed something simple to do to unwind after work. The only part that gave me problems was flambéing the raisins.
I have long had a fear of fires. I've never been burned by an open flame, so I'm not sure why I become this meek and lame coward whenever I have to work with one. It took me a long time to relax around a Bunsen burner in Chemistry lab, and I am still a bit uneasy each time I turn one on. So it was natural that I approached this recipe with some apprehension. To make matters worse, I didn't have any long matches and had to use a long-tipped lighter. I worried that the flames would grow wild and ignite the entire lighter, so much so that I set aside a glass of water just in case a real fire started and decreased the amount of rum by 1/2 tablespoon to make it more manageable. However, all of my worrying was for nothing because everything went smoothly. The blue flames just did their thing and then peaced out. It was actually kind of pretty, and I was smug as hell that I had done the deed.
Ingredients (adapted from Dorie Greenspan's Baking: From My Home to Yours)
- 6 ounces of chocolate (combination of bittersweet and semisweet), chopped
- 8 tablespoons of unsalted butter, room temperature
- 1/3 cup raisins
- 1 1/2 tablespoons water
- 1 tablespoon golden rum
- 3 large eggs, room temperature
- 3/4 cup + 2 tablespoons sugar
- 1/2 cup all-purpose flour
- 1/8 teaspoon cinnamon
- 1/8 teaspoon salt
In a small pot, heat the raisins and water until the water is almost completely evaporated. Remove from heat and add the rum. Carefully ignite the rum with a match or lighter, and flambe the raisins. Once the flame dies down, set aside the raisins.
In a stand mixer fitted with the whisk attachment, beat the eggs and sugar until a pale and thick mixture is formed, which will take about 2 minutes. Reduce the speed and add the chocolate-butter combo, mixing just until the chocolate and butter are incorporated. Add the dry ingredients, and mix on low for 30 seconds. Finish incorporating the dry ingredients by folding by hand. Finally fold in the raisins and whatever liquid is left in the pot with them.
Pour the batter into an 8x8-inch baking pan lined with foil and lightly greased with butter. Bake the brownies for 35 minutes at 300 degrees F until the top becomes dry and cracked and a cake tester comes out clean.
These brownies proved that my oven must run warmer than Dorie Greenspan's. In the book, she had instructed to bake the brownies for 50 to 60 minutes. However, I decided to check on the brownies at the 35-minute mark, and they were ready to come out of the oven. Luckily, I noticed the cracked top in time because the brownies were just right in terms of their moisture content. These brownies were pretty much perfect; they were moist, chocolately, and not too sweet. The brownies weren't fudge-like, but they weren't cake-like either; they were somewhere in the middle and fluffy in texture. The cracked top looked elegant in my opinion, and I liked the taste of it. They weren't like traditional brownies, but I still loved them. I definitely will be making these again in the future. The only change I would make is maybe add more raisins since my dad requested more.
I highly recommend trying this recipe in your own kitchen if you have the funds to make this decadent dessert (the price of butter and chocolate has gone up so much!). It's easy, comes together quickly, and produces a super yummy dessert.
 Last bite!
 Happy June! I can't believe it's June already; I know it's a cliche, but time really passes so quickly as you age. I seriously feel like I celebrated New Year's the other day, but that was six months ago!
Today I start my summer internship, and I'm a bit apprehensive about it. I have no idea what I'll be doing and only hope that it won't be too overwhelming. I am on my last summer break ever...
Since I am on summer vacation and have a bit more free time now that I don't have anything to study, I've decided to give this blog a makeover. When I started this blog three months ago, I was so excited about jumping into the world of food blogging and sharing my experiences in the kitchen right away that I didn't give any thought as to the direction that I wanted this blog to take. I threw together a header and started blogging.
Now I'm not so satisfied with how my blog looks, so I'm slowly yet surely working on a new layout. I hope to have it finished in the next couple of weeks, and I think it'll be a better reflection of my culinary adventures.
Have a great Monday!
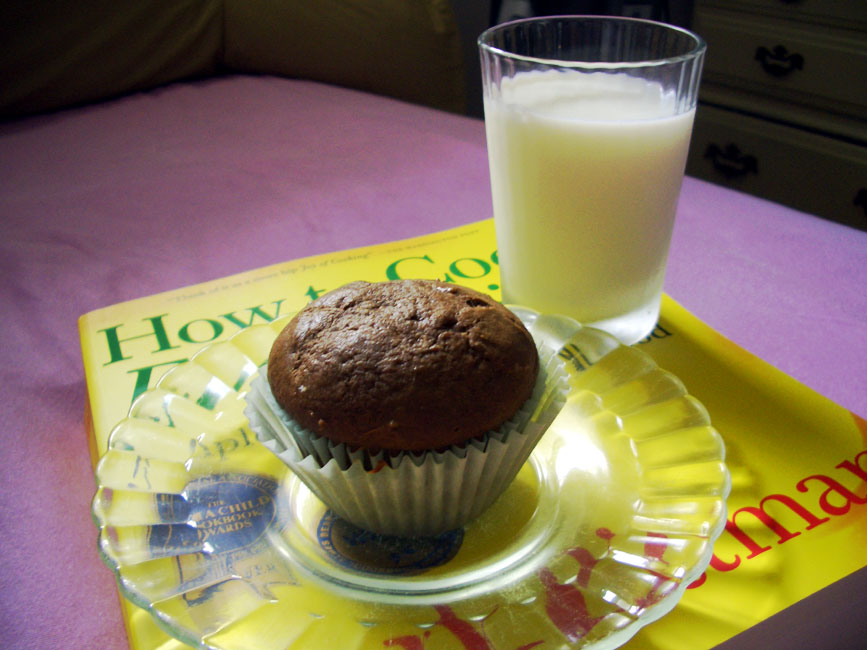
My search for just-the-right chocolate cake recipe continued this past Tuesday when I made a chocolate cake base for the ice cream cupcakes that I put together for my mom's birthday. This time I followed the chocolate layer cake recipe in Mark Bittman's How to Cook Everything. I had pretty high expectations of Mark Bittman; he's a NY Times Dining columnist, he has a blog I visit fairly often, and he wrote a book (the one in question) that people compare with the Joy of Cooking.
Did the recipe live up to the hype? No, but that might have been my fault. I didn't realize that each square of the Ghiradelli chocolate baking bars were only 1/2 ounce instead of one ounce, so I added half the chocolate that the recipe required. I cut back on both the butter and sugar, and I used reduced-fat sour cream. Plus, I'm not sure if my folding technique was up to snuff. The end result of all these factors was bad cupcakes. They looked beautiful and puffed up perfectly, but the taste and texture were off. They were dry and didn't have enough chocolate flavor. I'll try this recipe again before I came to a final verdict, but I'll have to follow it much more closely.
Devil's Food Chocolate Cupcakes (adapted from How to Cook Everything)
Ingredients
- 5 tablespoons of unsalted butter, room temperature
- 2 cups all-purpose flour
- 3 ounces unsweetened chocolate, roughly chopped
- 3/4 cup sugar
- 2 eggs, separated
- 1 teaspoon vanilla extract
- 1 1/2 teaspoons baking soda
- 1/2 teaspoon salt
- 1 cup sour cream
Melt the chocolate, and stir until a smooth consistency is achieved.
Cream butter, and then gradually add the sugar. Beat until light and fluffy before adding the egg yolks, one at a time. Once the egg yolks are incorporated, beat in the vanilla and the melted chocolate.
Mix together flour, baking soda, and salt. Add these dry ingredients into the wet mixture, alternating with the sour cream and stirring by hand. Stir until smooth.
In a separate bowl, beat the egg whites into soft peaks. Then fold them into the rest of the cake batter. Divvy the batter into the lined muffin tins. Bake for about 14 minutes, until a cake tester comes out clean. Cool on a rack until the cupcakes reach room temperature.


