Mark Bittman, author of How to Cook Everything and writer for the "Minimalist" column in The New York Times, has a blog, and I have to admit that I'm lurking around there everyday. If you haven't visited his blog before, you'll be in for a treat. He posts simple recipes daily, and he has a few cooking videos on the site.
Over the weekend while I was catching up on my favorite blogs during one of my many study breaks, I had the pleasure of watching this cute video on Bitten. The kid featured was so adorable that I had to document this video for my own records. I can't help but wonder how someone so young could learn how to make ganache when I haven't even made it myself.
I hope you all enjoy it as much as I did!
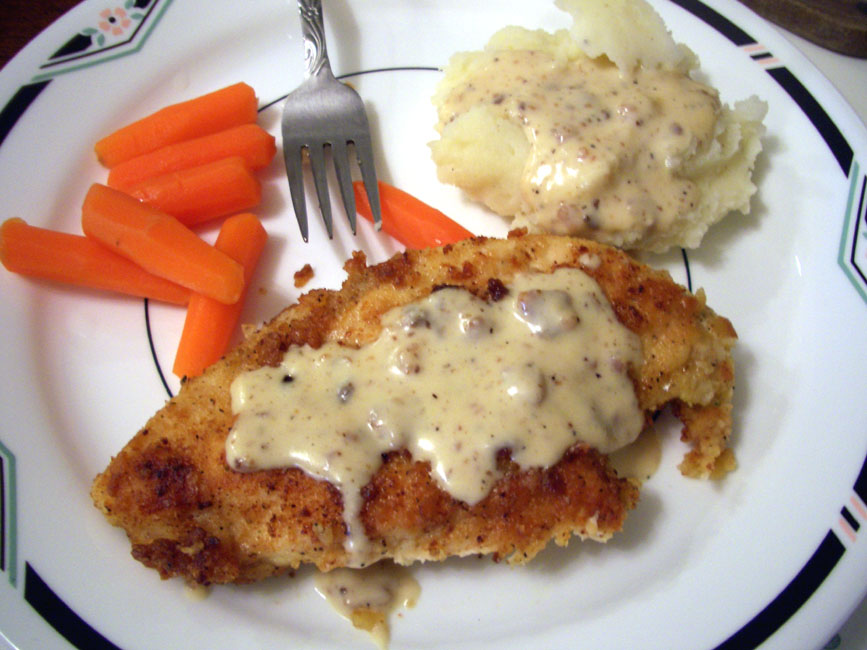
I have a Vietnamese mother and a Vietnamese father, so I've always been puzzled about how exactly my love for Chicken Fried Chicken came about. My first and primary exposure to the dish was through the workings of my elementary school's cafeteria ladies. My favorite lunches were noontime dining spent savoring the crispy, fried outside and slightly salty, juicy insides. The chicken fried chicken had to be served with country gravy. Otherwise, it wouldn't be the right dish. It's really weird to think that I fell in love with cafeteria food. Shows you what poor taste I have...
I found a recipe on Allrecipes, and it seemed easy enough.
Ingredients
- 26 saltine crackers
- 6 garlic & herb flavored Ritz-like crackers
- 2 tablespoons all-purpose flour
- 2 tablespoons dry potato flakes
- 1 teaspoon salt
- 1/2 teaspoon ground black pepper
- 1 egg
- 1/4 cup vegetable oil
- 4 boneless, skinless chicken breasts (1 pkg at normal, everyday grocery stores)
I poured all the crackers into a large, quart-sized storage bag and sealed them in. I then crushed the crackers into fine to small crumbs. To this I added the flour, potato flakes, salt, and pepper. I mixed this all up by shaking the bag vigorously for a minute or so. Now my coating was all ready to go.
I poured the vegetable oil into my largest skillet and evenly distributed it along the bottom of the pan. While the oil heated over medium-high heat, I beat the egg in a shallow bowl. Once the oil was hot, I dredged one chicken breast in the beaten egg and dropped into the bag of crumbs. I coated the chicken in crumbs by shaking and turning the bag in every direction until none of the chicken's pink was showing through. Then I placed the chicken into the skillet and let it fry on one side for about 8 minutes. Once that was done, I turned it over and fried the other side for another 8 minutes. I continued this pattern until the chicken was longer pink inside and its juices ran clear. I repeated these steps for the remaining pieces of chicken breast.
Since I had a pretty big skillet, I was able to fry two pieces of chicken at one time. Each piece took about 20 minutes to cook completely. Once they were all finished, I blotted them with some paper towels to remove the excess grease.
To make the country gravy, I used the frying oil in the pan. I added some flour, salt, pepper, heavy cream, and whole milk to the oil. I didn't use a recipe at all for this; I had remembered my friend in my high school telling me that country gravy was made of these few ingredients. I eyeballed everything and added flour and milk until I got the consistency and taste that I wanted.
I ended up serving chicken fried chicken for my family's Easter dinner. Since I had decided to peel a bag of baby carrots to make them look nice (they were kind of old and weathered on the outside) before boiling, I had a late start to making the chicken. Because each round of chicken frying took at least 20 minutes, Easter dinner was served kind of late this year. However, my parents really liked the dish and enjoyed it. It was very, very tasty in my opinion. Their only criticism was that the chicken and gravy was a little too salty. I'll have to be careful with that stuff next time; a little salt goes a long way.

So when I set off to execute my first challenge as a member of the Tuesdays with Dorie baking group, I was a bit apprehensive and felt deep-down inside that the caramel-topped flan (aka creme caramel) was going to turn out horribly. However, I was pleasantly surprised on Saturday night when these golden little cups of egg-y goodness came out of the oven.
As with all Tuesdays with Dorie challenges, this recipe came from Dorie Greenspan's newest cookbook, Baking: From My Home to Yours. I borrowed a copy from the library over the weekend and had a hard time putting the book down. I kept on flipping through its pages and admiring the beautiful pictures. The recipes also seem easy enough to follow as evidenced by my success with the flan. I will definitely order my own copy soon.
Ingredients (sized down to 1/2 of the original recipe)
For the caramel
- 1 1/2 tablespoons of water
- 1/6 cup of white sugar
- A squeeze of fresh lemon juice
- 3/4 cup of heavy cream
- 5/8 cup of whole milk
- 1 1/2 large eggs
- 1 large egg yolk
- 1/4 cup of sugar
- 1/2 teaspoon of pure vanilla extract
I decided to make the flan in 6 little brioche baking cups that I had bought at Ross a while back but had never used. Since each cup only held about 1/3 cup of liquid (or a little less), I had to halve the recipe detailed in the book. In a small pot, I dissolved sugar in some water and lemon juice to make the caramel. I constantly stirred the mixture over medium-high heat until the sweet liquid became an amber color. I stopped and took the pot off of the heat when I got my first whiff of what I thought was a burning smell. I then distributed the caramel into the brioche cups, haphazardly trying to distribute the syrup evenly on the bottoms of the cups. I lined the cups in the 9x13 in baking pan and set them aside.
For the flan, I stirred together the milk and heavy cream in a small pot and warmed it over a medium heat until the mixture began to boil a bit. I stirred frequently, stopping and removing the pot from the heat when I saw the first series of bubbling. Meanwhile, whisked the eggs, egg yolks, and sugar with a fork in a large bowl. Once an even mixture was created, I stirred in the vanilla extract. Then I began to temper the eggs by pouring a quarter of the heated milk/heavy cream combo into the egg mixture while whisking like mad. As soon as I made sure there weren't any chunks of cooked eggs in the mixture, I slowly whisked the remaining heated combo into the egg mixture. When I was finished mixing everything, I skimmed off all of the froth and bubbles lining the top with a spoon.
I poured the flan mixture into the brioche cups lined up in the 9x13 in baking pan. I then carefully placed this all into the preheated oven. This was particularly tricky because the cups were filled to the brim (I didn't want to waste any of the flan!), but slow and steady got the job done. I then slowly filled the baking pan with the hot water from the teakettle until the water line hit halfway up the brioche cups.
I baked the flan for about 30-35 minutes until the bottoms (or what would be the bottoms) were browned.
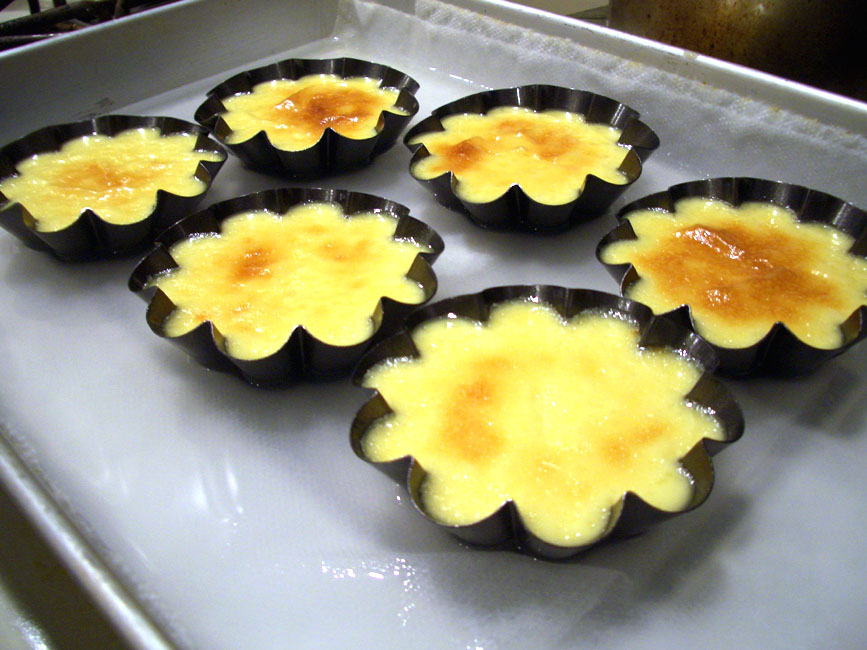 I took them out of the baking pan and set them on a making shift wire rack to cool. I was anxious to taste the flan, but I had to wait until the next morning to sample my work because the flan had to set in the refrigerator for at least four hours. It was a wonderful way to celebrate Easter morning, though!
My parents felt that the flan was a little too hard. Maybe less baking time? Less egg? It was hard to add 1/2 of an egg, so I might have added a tad too much. More milk? I have no idea. Also, the brioche cups created a very pretty petal-like edge for the flan, but it was very tricky loosening the flan from the cups. I kept on cutting into the flan. I probably will invest in some proper ceramic ramekins for my next round of flan.
 Oklahoma doesn't stereotypically bring to mind much aside from fields, football, and singing pioneers trying make a life for themselves out in the Great Plains. However, this state does have its fair share of cultural shindigs, and I attended a wonderful one this past Friday when Untitled ArtSpace had a reception to welcome a new exhibit, Art 365. Featuring the works of six local artists, there were definitely some great pieces on showcase that night. My favorite artist of the night was by far Betsy Barnum, and through a bit of stalking, I found out that she has a blog! Check out her work, and prepare to be amazed.
The art was nice, but what really took center stage for me were the food and drinks available to gallery visitors. Viewers could enjoy some wine or a non-alcoholic beverage while they surveyed the art. It was a great compliment to the cheese and chocolate served that night. Though the chocolate was of the standard Hershey's brand, the cheese was phenomenal! There were rounds of brie, Jarlsberg, and a couple of other cheeses I had never tasted. My favorite was a semi-creamy white cheese rolled in an herb mixture. If you have any idea what this type of cheese is, please, please let me know ASAP. I couldn't get enough of it Friday night and would like to sample it a bit more.
As I was leaving the gallery for the night, I regretted not taking a picture of the food table. The cheese and chocolate was prettily arranged on a rustic, heavy wooden table. I'll just have to make due with the photo above, picturing a couple of measly crackers, pieces of cheese, and Hershey's pieces. C'est la vie.
Untitled ArtSpace
1 NE 3rd Street
Oklahoma City, OK 73104
 After finishing Julia Child's fabulous autobiography, My Life in France, I was hungry for another tale of a female discovering the positive impact that cooking has one's life. I had to look no further than Julie & Julia. This book is written by Julie Powell and details her insane attempt to execute in one year all the recipes in Julia Child's Mastering the Art of French Cooking. That is 524 recipes in 365 days!
I am finishing up the book, so I can't tell you whether or not Julie completes all the recipes within a year, but I can tell you that I am enjoying the book. However, I wasn't always a fan. Since I had just finished reading Julia Child's autobiography, I was expecting something written in the same light-hearted and wondrous tone. Instead, this book is pessimistic from page one. It was dramatic and discussed all sorts of issues from lackluster sex lives to the boredom that comes with working temp jobs. Sound familiar? It should because all chick lit books have the same formula. Now, I'm as much of a voracious reader of chick lit books as any other girl (or boy); I really dig the works of Meg Cabot and Helen Fielding. For some odd reason, though, I couldn't get behind Julie right away. I found her to be too gloomy and whiny, but I marched on through the book anyway. I set aside a little bit of time every night to ready a few more pages of the book and made up little reading schedules for myself. Since I'm a goal-oriented person, this technique really helped me get through some of the book.
However, as the story and Julie's life progressed, I found myself no longer marching. I was actually looking forward to finding out more about her escapades in the kitchen, and I set aside larger chunks of time to read the book everyday. It was as if I had warmed up to Julie around the middle of the book. I'm not quite sure why this is, but I think it's because she started describing more of the support she received for this project. Her friends and brother were over at her apartment more, and blog readers (or "bleaders") began to comment on her blog. As a result, I think Julie realized her own potential and developed a sense of purpose.
This book started out a wee bit slow, but it is now a pretty awesome read. What's even cooler is that Julie Powell chronicled her Julie/Julia Project on a blog. So as soon as I finish getting the retrospective look on the project from this book, I can read up on Julie's thoughts as she completes each dish and moves a step in her quest to recreate all of Julia Child's creations. I can even see all of the comments left on her blog, which, as described in the book, are pretty wacky and funny.
I highly recommend Julie & Julia because it's kind of inspiring in a voyeuristic way. Plus, this book is being adapted in a film with Amy Adams portraying Julie Powell and Meryl Streep playing Julia Child. Pretty nifty...
Ingredients
- 2 eggs
- 7/8 cup vegetable oil
- 1 3/4 cups white sugar
- 2 1/2 teaspoons ground cinnamon
- 1/2 teaspoon salt
- 1 teaspoon vanilla extract
- 2 cups all-purpose flour
- 1 teaspoon baking soda
- 2 1/2 small Gala apples, peeled, cored, and chopped
In a large mixing bowl, I beat together the eggs and oil until well incorporated. Then I beat in the white sugar and vanilla until I no longer saw a trail of sugar. Once that settled, I added the dry ingredients. I added the salt, baking soda, and the remaining ground cinnamon before beating everything well. I added the flour, 1/4 cup at a time, stirring well after each addition. Finally, I stirred in the cooked apples.
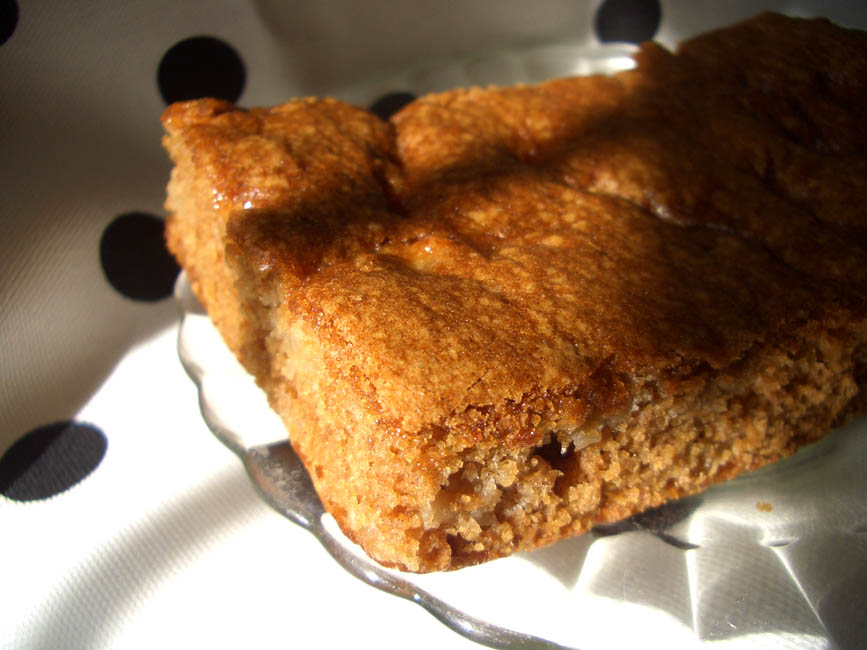
I poured the batter into a 9x13 in baking pan sprayed with Baker's Joy baking spray. This all went into the oven and stayed there for 35-40 minutes, until a cake tester came out clean and the sides of the cake began to pull away from the sides of the pan.
I thought I had burned the cake, but it was moist when I tasted it. The cake had a rich, caramel color. It has a really subtle flavor, and each bite of apple is highlighted by the cinnamon. My parents definitely enjoyed it, and we all indulged in a piece this morning for breakfast.
Ingredients (for 36 cookies)
- 2 1/4 cups all-purpose flour
- 1 teaspoon baking soda
- 3/4 cup of butter, softened
- 5/8 cup packed brown sugar
- 1/4 cup (scant) white sugar
- 1 package of instant vanilla pudding
- 2 eggs
- 1 teaspoon vanilla extract
- 2 cups semisweet chocolate chips
Once my butter was soft enough (if it gives easily when you press on it), I set about to sift the flour and baking soda together in a pretty big bowl. I recently bought a spring-handle sifter, and it makes this step a bit easier (not too much because it's still a bore to do all of this sifting).
I preheated the oven to 350 degrees F before moving on.
Next I creamed together the butter, brown sugar, and white sugar in a large bowl. I used a stand mixer this time around, but I usually use a hand mixture when I'm making these cookies at my friend's apartment. I like to cream it until the mixture is a pale, pale yellow and kind of fluffy.
Then I beat in the instant pudding mix. As soon as that was all settled, I began to blend in the flour mixture. Don't dump the entire mixture in at one time. I added about 1/4 of the flour mixture at a time, and I made sure not to over stir the dough. Once a batch of flour begins to incorporate into the dough, add the next portion of flour mixture. Finally, I stirred in the chocolate chips (and ate one or two of them in the process).
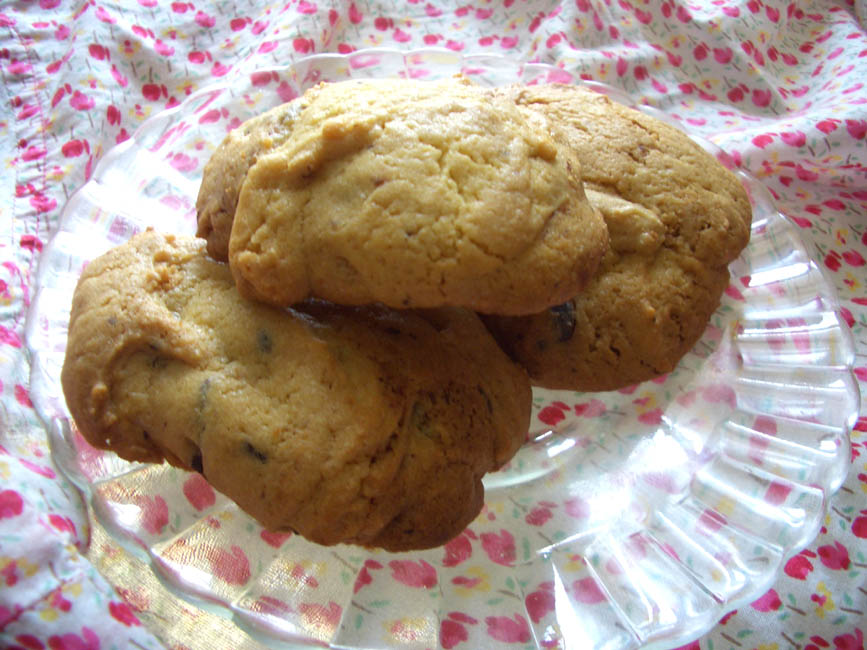
I used a tablespoon to drop the cookies onto an ungreased cookie sheet. I prefer my cookies to have a natural, homemade look, so I didn't shape the dough at all. It was just scoop and plop. I baked the cookies for about 12-13 minutes, until the edges were golden brown.
I just love these cookies. They smell great while baking and taste awesome fresh out of the oven. A delightful snack on a gray day!


